A 3D-printed dispenser that gives you the amount of toothpaste dentists recommend with one button press. Our team of three built it for Northeastern's Cornerstone of Engineering class.
TEAM PROJECTMICROPYTHONRASPBERRY PI PICO3D PRINTINGACCESSIBILITY
A 3D-printed dispenser that gives you the amount of toothpaste dentists recommend with one button press. Our team of three built it for Northeastern's Cornerstone of Engineering class.
TEAM PROJECTMICROPYTHONRASPBERRY PI PICO3D PRINTINGACCESSIBILITY
Parts tour
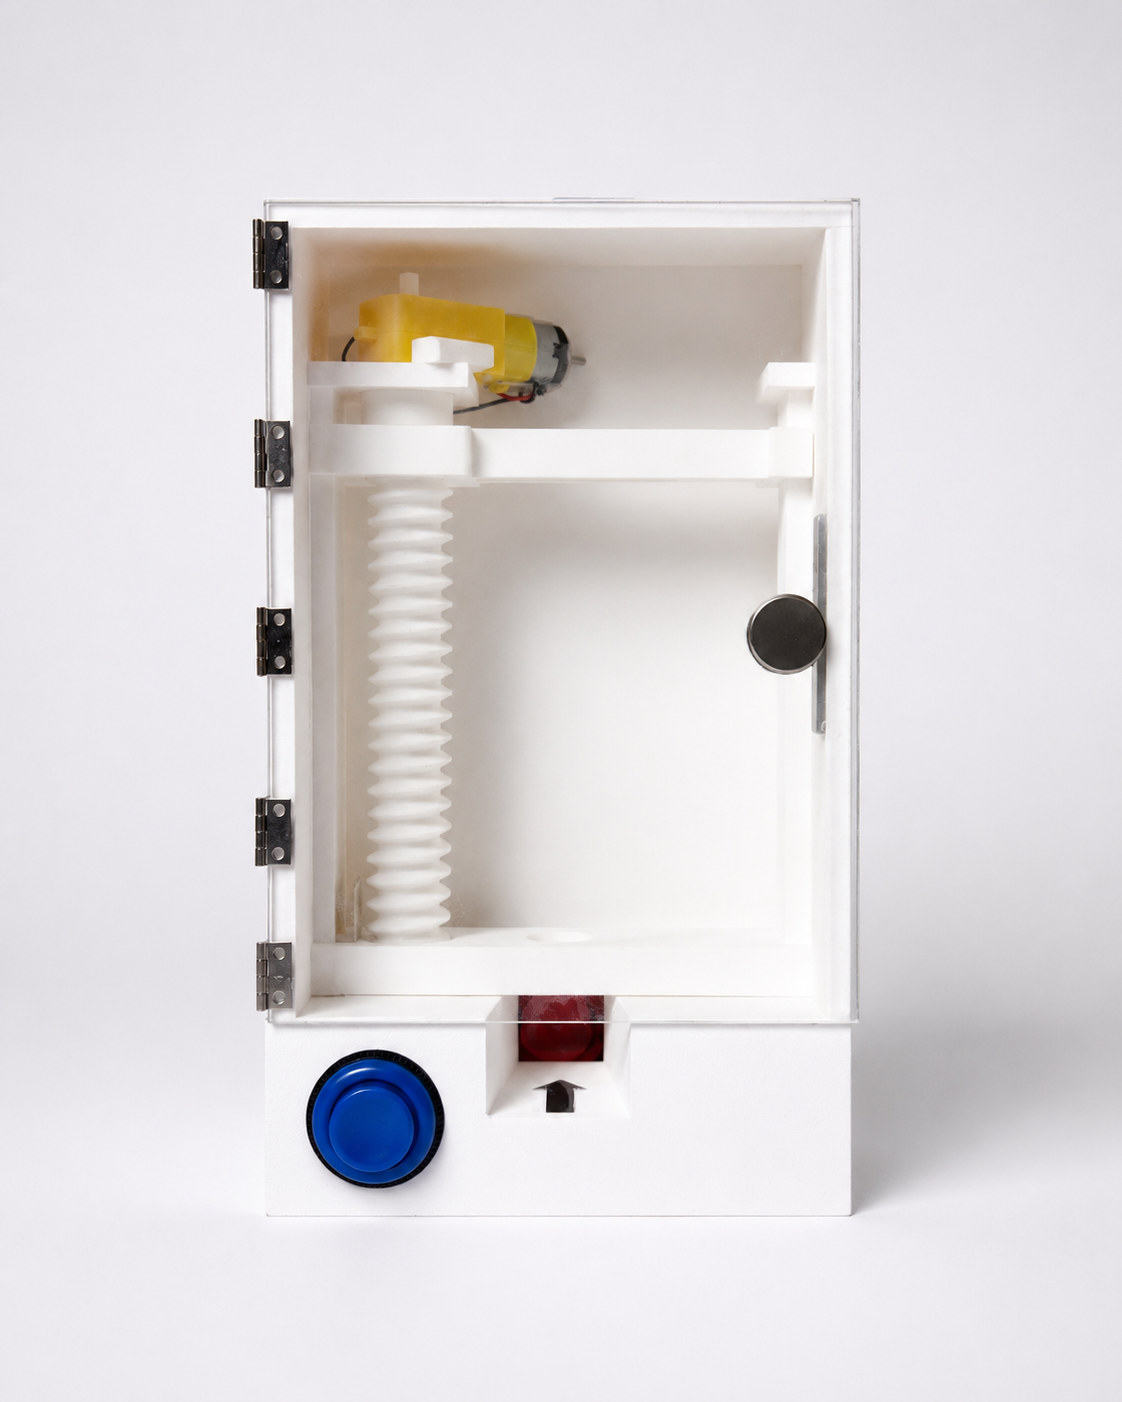
Start button
Press it to get a dose from the slot underneath. The adult setting gives a pea-sized amount and the kid setting gives a rice-sized amount.
Settings button
Press it once to switch between the adult and kid dose. Press it twice quickly to run the motor backward, which lifts the arm so you can put in a new tube.
3D-printed threaded screw
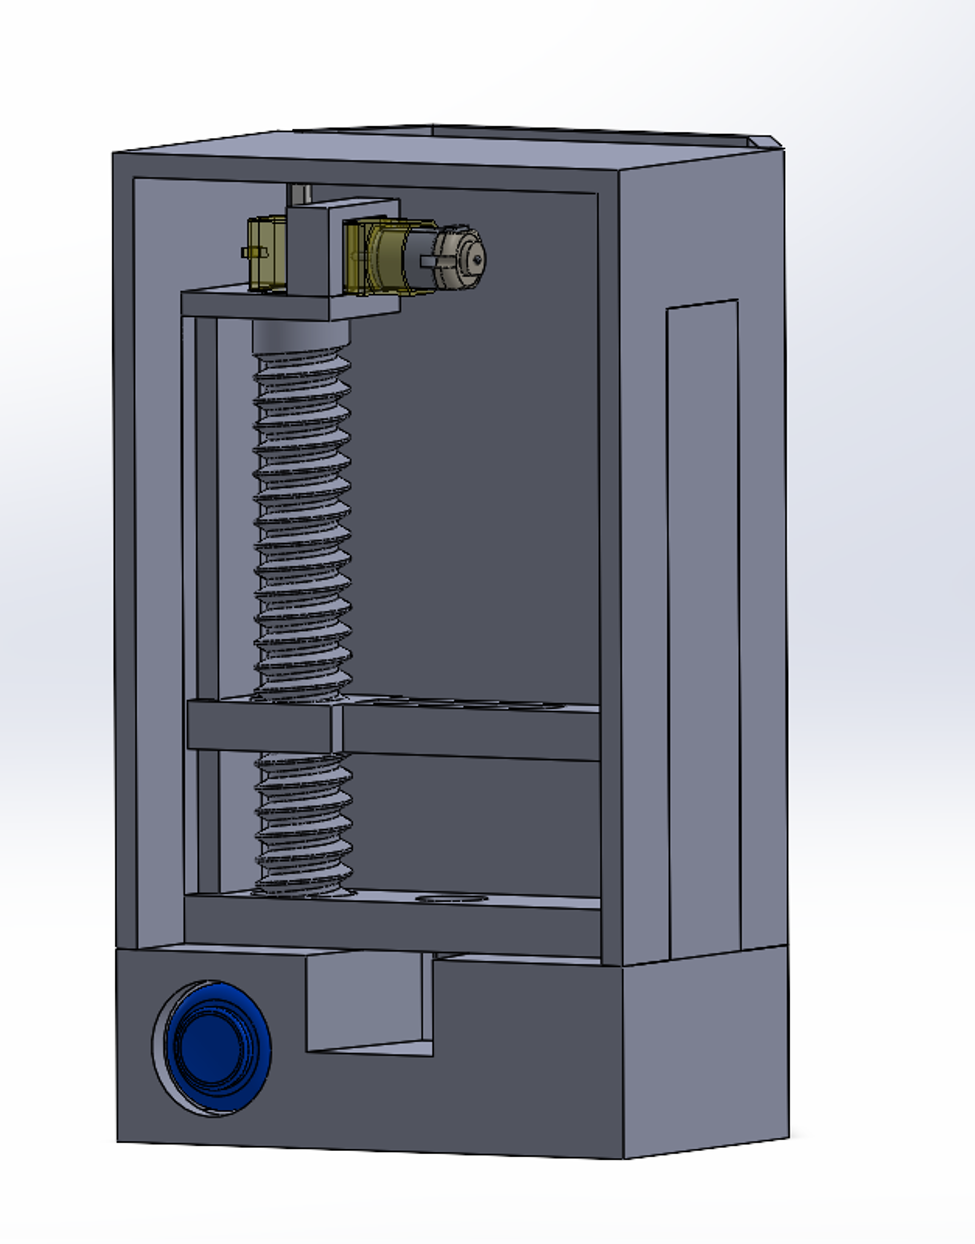
The motor spins this screw, and the arm rides down its threads. That's how the motor's spinning becomes a straight push on the tube.
DC motor
This motor turns the screw. The Pico switches it on, off, and into reverse through the motor driver.
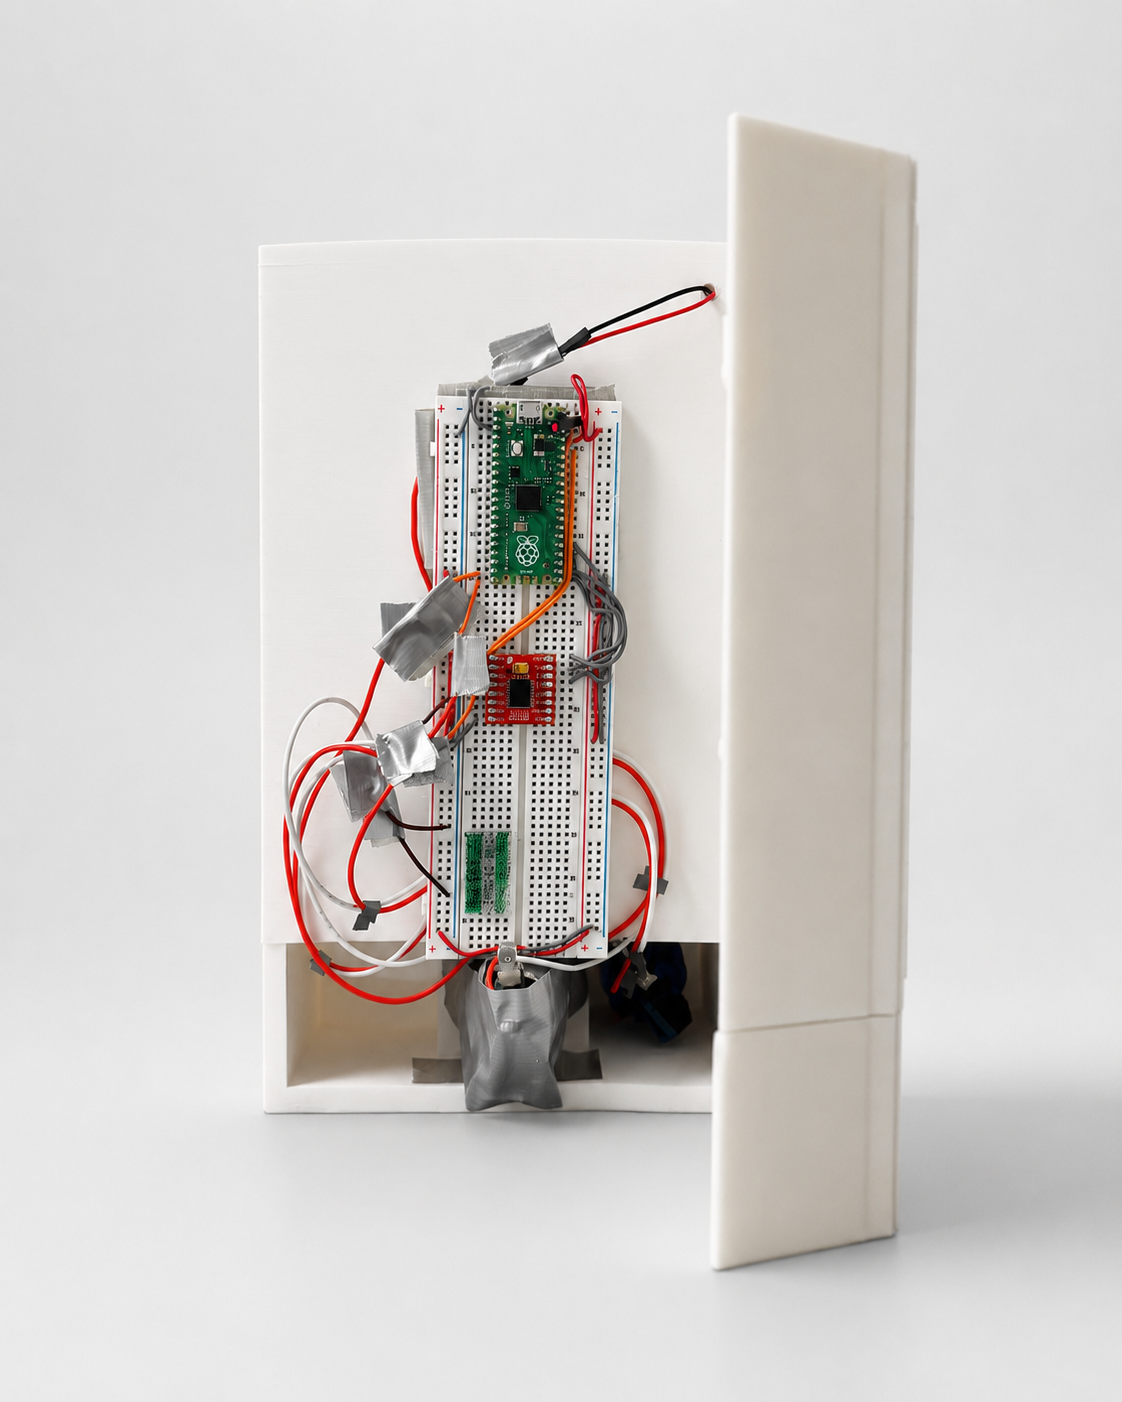
Raspberry Pi Pico
This small computer runs the whole dispenser. I wired it up and wrote all of its code in MicroPython.
Dual-channel motor driver
The Pico can't power a motor on its own, so this TB6612FNG driver board sits in between. It lets the motor run forward or backward.
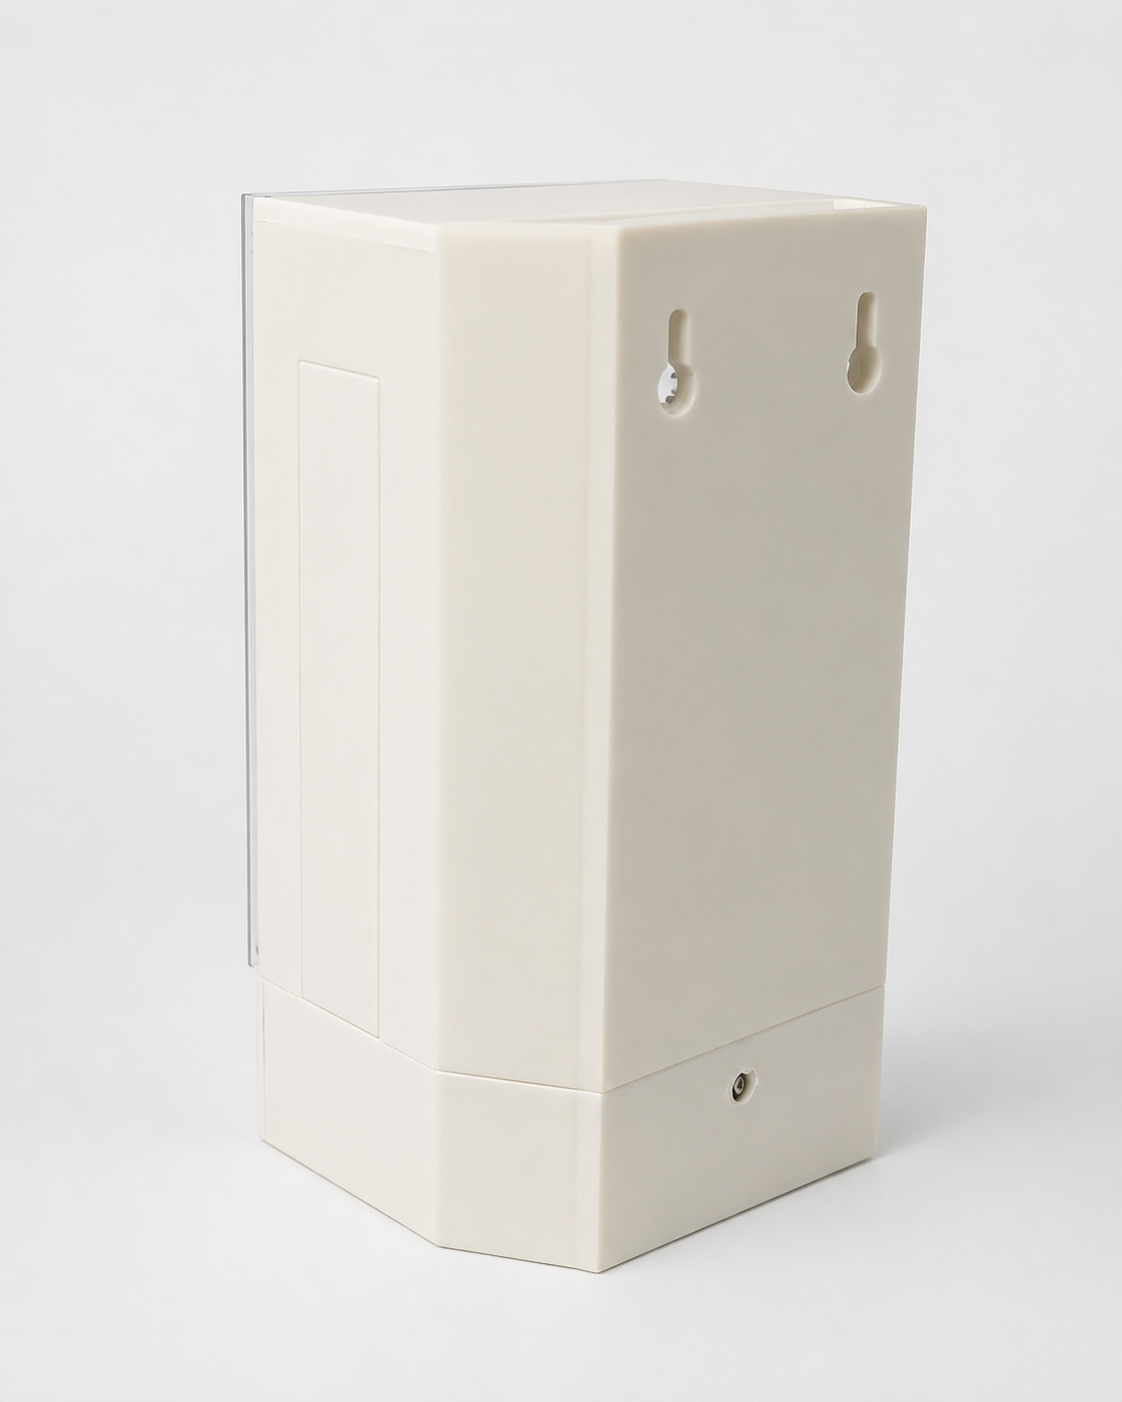
Keyhole wall-mount slots
These slots on the back let you hang the dispenser on regular bathroom wall screws.
The problem
For people with arthritis or Parkinson's, squeezing a toothpaste tube can be painful or even impossible. Kids have the opposite problem. Over a third of them use more toothpaste than they should, because nothing tells them how much is enough.
We wanted to make getting the right amount easy for everyone, from a six-year-old to someone who has trouble using their hands. With our dispenser, it takes one button press.
How it works
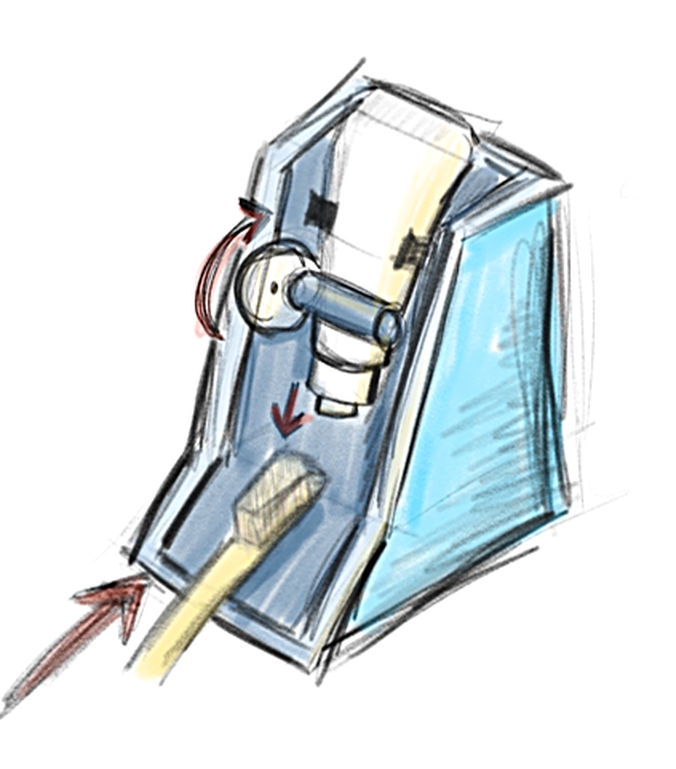
The dispenser hangs on the wall, and the toothpaste tube slides in from the top. Inside, a 3D-printed screw and a squeezer arm sit up against the tube.
When you press the Start button, the Raspberry Pi Pico (the small computer that runs everything) checks which dose you picked and runs the motor at full power. The motor turns the screw, which pushes the arm down onto the tube for just the right amount of time. Then the motor stops and your toothpaste comes out.
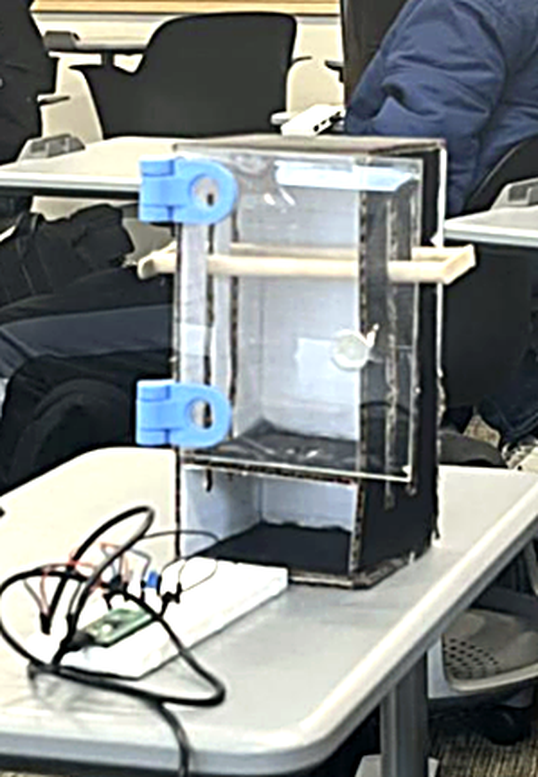
A clear front door lets you see how much toothpaste is left. Two keyhole slots on the back fit regular bathroom wall screws, so you don't need any special hardware to hang it.
Buttons and code
There are two buttons. The Start button gives you a dose. The Settings button switches between two doses. The adult dose runs the motor for half a second, and the kid dose runs it for a quarter second. If you press Settings twice within 0.6 seconds, the motor runs backward and lifts the arm back up, so you can load a new tube without taking anything apart.
When you press a button, the metal contacts bounce for a split second, so one press can look like several. To fix that, the code checks the buttons in a loop and waits 25 milliseconds to make sure a press is real. This is called debouncing, and doing it this way meant I didn't need interrupts, a more advanced way of reacting to button presses.
The part of my code that runs a dose
AdultDuration = 0.5    # pea-sized dose
ChildDuration = 0.25   # rice-sized dose

def motor_forward(duration):
    ain1.value(1); ain2.value(0)   # set direction
    pwma.duty_u16(MotorDuty)       # full power
    time.sleep(duration)           # run for dose time
    motor_stop()                   # then stop

def start_mechanism():             # start → dispense
    motor_forward(TimeSetting)
Who did what
What I did
Did all the electronics, wiring the Pico, the motor driver, and the buttons
Wrote all the MicroPython code, including the dose timing, the two dose settings, and the button debouncing
Added the double-press that runs the motor backward, so you can change tubes without taking the dispenser apart
Came up with the idea for the clear plexiglass door so you can see how much toothpaste is left
Put together and tested all three of our prototypes
What Simon Hume and Bora Bromberg did
Designed the case, threaded screw, squeezer arm, and wall bracket in SolidWorks, a 3D design program
Took the design through three versions, from cardboard to a first 3D print to the final build
Built the clear door into the case design
Wrote the project report and documentation, and made the presentation
Three prototypes
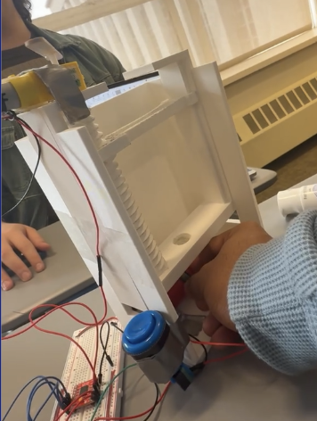
We built three prototypes over the semester. The cardboard version helped us figure out the basic layout, like where the tube and buttons should go and how big the whole thing should be. Our first 3D print showed that the screw's threads needed to be closer together so the arm would press evenly without slipping. For the final build, we made the parts fit together more tightly, moved the Pico so it wasn't in the way of the motor wires, and added the keyhole slots for hanging it.
The hardest part was matching how far the arm moves to how long the code runs the motor. If the motor runs too short, you get a different amount every time. If it runs too long, the motor jams. We picked the half-second and quarter-second timings by testing them over an entire tube.